How to Get the Most Out of Your Favorite Pumpkin Carving Stencils
Pumpkin carving stencils come in all shapes, sizes and difficulty levels. From modern 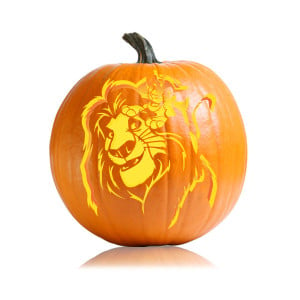 patterns like those found in the Angry Birds pumpkin stencil package to traditional designs like the Savage jack-o-lantern, there are many options available to Halloween revelers of all ages. It doesn’t hurt to spend some time browsing stencils weeks or even months before the holiday.
Pre-made stencils have become hugely popular because they are inexpensive, easy to use and come in so many diverse styles. Many categories are available at Ultimate Pumpkin Stencils including celebrity, Disney, super hero and killer quotation themed designs. The following suggestions will help you get the most out of your favorite Halloween stencils!
Transfer Your Pumpkin Carving Stencils before Cutting
Unless you are a professional artist with lots of carving experience, you will need to transfer your chosen design to the pumpkin. It may be tempting to save time and jump right to the fun part, but skipping this step will mean you are carving blind. A guideline must be present so you know exactly where to make each incision. Luckily pumpkin carving stencils can be easily printed from the internet so you can still save time without making the process more difficult than it needs to be.
Have a nail or a pumpkin poker tool available when you begin transferring the design. Apply all pumpkin carving stencils with plenty of masking or scotch tape. Almost any type of tape will work as long as it sticks to the skin. Trim extra corners and edges so that the sheet rests as flat as possible against your pumpkin. Don’t be afraid to tape it all the way around. The pumpkin is a three dimensional object, which can make this step challenging if you are not careful about proper stencil placement. Watch this video for more great tips on how to trace your pumpkin stencil.
Don’t Carve Your Pumpkins Too Early
Even the simplest pumpkin carving stencil will speed up the rotting process. Pumpkins are organic and will eventually deteriorate just like any other fruit or vegetable. Most untreated jack-o-lanterns will begin to show signs of rot and mold within three to four days after carving. It is best to wait until two to three days prior to the holiday before making the first cuts.
Give Your Jack-o-Lantern a Drink before Putting Him on Display
Some carvers take extra measures to preserve their hard work. After cutting out the pattern provided by your pumpkin carving stencils, carefully place the jack-o-lantern in a bucket of water so it is completely submerged. Soak it for approximately two to three hours to allow the pumpkin to regain some hydration. Another option is to place the jack-o-lantern in a solution of water and bleach. This can preserve the pumpkin for over a week.
Protect Your Pumpkin from Mold and Rot
A quicker option is to dab a layer of petroleum jelly around the inside of each cut. This approach will prevent sagging and rotting for a while, but is usually not as effective as a good soaking. Pumpkin carving stencils often have tiny corners and areas that will require special attention when using this method.
Other options include adding a layer of hair spray, lemon juice or a wet towel. Always proceed with caution when using a substance this flammable. Some protective materials may not be safe to use when an open flame is present inside the pumpkin. Make the designs you create with pumpkin carving stencils last as long as possible so your guests and neighbors can admire your unique Halloween creations for many days before and after the holiday!


